Friday, May 27, 2016

Wheelsport Fantasy Mini Velo: 1x11 Speed Lightweight Setup - Part 2

With the 1x11 speed drivetrain settled in Part 1 of this bike upgrade, the next step is to cut some weight from the Wheelsport Fantasy mini velo. The obvious choice would be to upgrade everything to lighter weight components, but that would need a heavy investment which is not what I want to do.
To recap, the objective of this project is to first, create a 1x11 speed drivetrain and second, to make this bike more lightweight. These objectives should be achieved without spending too much money and making radical changes.

For a start, the components for the front double drivetrain can be removed as they are no longer necessary for a front single drivetrain.

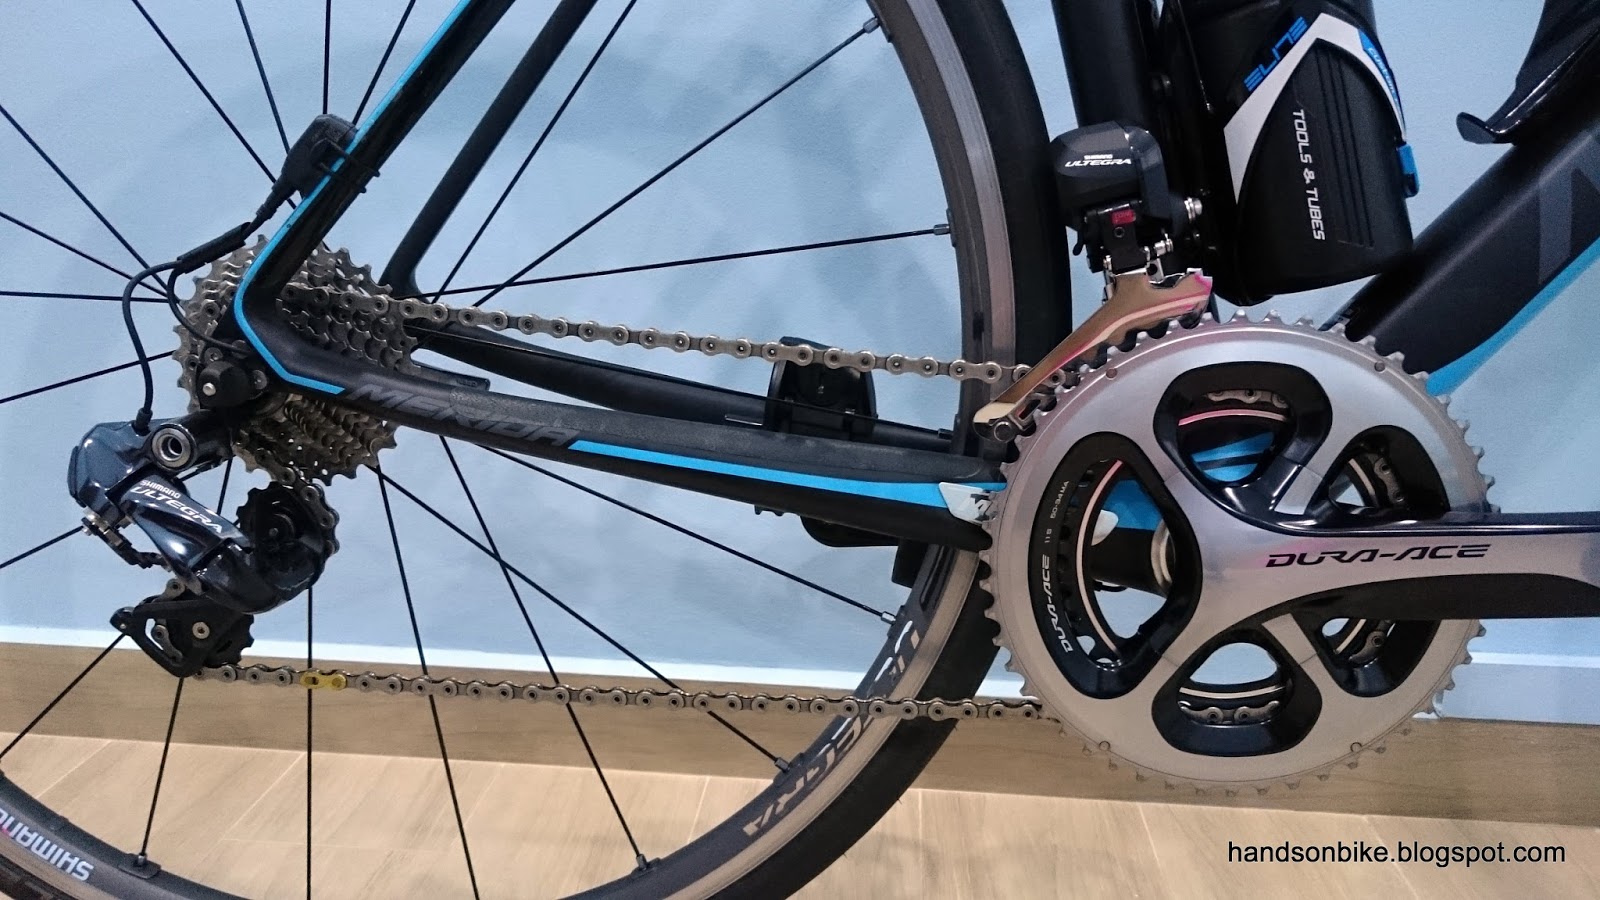
Original setup with front derailleur and front double crankset

The front double crankset will be replaced by this single chain ring setup

Ultegra 6800 front derailleur can be removed, along with the custom FD mount. Saves 106 grams.

Shifter outer casing and inner cable for the front derailleur can also be removed, together with the cable adjust bolt on the frame. Saves 35 grams.

Next, it is time to make some modifications to the components to save weight. I had considered changing it from a drop bar setup to a flat handlebar setup, but it would not save much weight. Keeping it as a drop bar setup would make it a 1x11 speed drop bar mini velo that would be more fun and sporty to ride.

For the left side road shifter, it is possible to modify it to remove the front shifting mechanism, as there is no front derailleur any more. This takes some experimentation and some special tools, so it is not recommended that you try this yourself. Also for the same reason, I will not go into detail on how the mechanism is removed, as some steps are irreversible, while the warranty is obviously void.

For the Ultegra 6800 left side shifter, the original weight is about 209 grams. In this 1x11 speed project, it only needs to function as a left side brake lever, and so the internal shifting mechanism and the release lever can be removed.

Weight of 164 grams for the left side Ultegra shifter after some parts are removed

Modified left side Ultegra shifter shown on the left, original left side shifter on the right.

Looks similar, except for the lack of release lever on the modified Ultegra shifter

As for the right side, it is still required for shifting and braking functions, and so it cannot be modified. However, it can be upgraded to Dura-Ace 9001 to save weight. In case you are wondering, it can be found just as a single side on Chainreactioncycles.com.

Weighs just 186 grams for the Dura-Ace 9001 right side shifter, which is really lightweight.

The total weight of these shifters is 350 grams, so it saves a bit over the original pair of Ultegra shifters which weigh 421 grams.

Another part of the bike where I can extract some weight savings will be from the seat post. The seat post which is currently on the bike is a pretty lightweight FSA SL-K seat post, at 239 grams for the 400mm length. However, it is actually too long for my usage, as I don't require the seat post to stick out of the seat tube that much.

The minimum insert length of this seat post is 100mm, but on this bike, more than 200mm of it is actually inside the seat tube. This means that some of it can actually be cut off to save weight, while still maintaining sufficient minimum insert length to be safe to use.

Minimum insert length of this 400mm seat post is 100mm

After some measurement, it is found that I can cut off 120mm from this seat post, and still maintain 100mm of insert length for my usage. This might yield quite a bit of weight savings, and best of all, it is free!

The difficult part is cutting the carbon seat post safely. After doing it the hard way when cutting the carbon steerer tube spacer previously, I wanted to do it correctly this time. This means using a proper carbon saw and a proper saw guide to cut the carbon seat post, and referring to YouTube for the instructional videos.

Tape the carbon seat post to prevent it from fraying during cutting, and mark the cutting line clearly (shown with the yellow line)

Saw blade designed for cutting carbon parts. Note the special teeth profile that is different from blades designed to cut metal.

A saw guide with a wider slot is needed to guide the carbon saw blade which is wider than usual saw blades.

Other than preparing the seat post properly for cutting, safety precautions also should be taken. Use a mask (such as N95) to prevent breathing in the harmful carbon dust, and use a wet cloth to cover the area near the cut to collect any stray carbon dust.

What I found after cutting through the carbon seat post was that the edges were actually quite smooth and even, with very little burrs seen. This is excellent as very little post processing is needed to smoothen out the cut area.

Raw finishing after cutting through the seat post successfully

Some minor sanding with sand paper was used to remove any remaining burrs and to smoothen out the edges

I was very surprised with the outcome, as the cut edges were in good condition and hardly needed any filing to remove the sharp/rough edges. It was also much easier than using the pipe cutter as I tried previously. This shows that with the right tools and the right technique, it makes cutting a carbon tube much easier and gives better results.

Final weight of the 280mm carbon seat post is 206 grams, which is a small 33 grams savings from the original length.

Despite cutting 120mm off the seat post, there was only a weight saving of 33 grams, which means that most of the seat post weight is actually in the saddle clamp rather than in the carbon tube. Nevertheless, it is a free upgrade in which I have nothing to lose.

In the next part of this project, the components will be installed onto the Wheelsport Fantasy mini velo, and we will see how lightweight it can be.

Part 3 here

Friday, May 20, 2016

Wheelsport Fantasy Mini Velo: 1x11 Speed Lightweight Setup - Part 1

The Wheelsport Fantasy Mini Velo is a really nice bike that I built up all by myself. After getting the frame and fork from the distributor, I sourced for all the bike components and installed them to the bike over a period of time.

Along the way, the components on the bike had also been changed, from the original Ultegra 6870 Di2 (transferred from the Dahon Boardwalk), to Ultegra 6800 mechanical (transferred from Merida Scultura 5000).

Wheelsport Fantasy mini velo with full Ultegra 6800 2x11 speed groupset

Recently, I did try to sell off the Wheelsport Fantasy mini velo, which is nicely equipped with the Ultegra 6800 2x11 speed groupset and a collection of other good components. The reason for selling it off is because I have too many bikes, and I can't find the time to ride them all. Besides, since I already have a folding bike (Dahon MuEX) for portability and a road bike (Merida Scultura) for speed, the Wheelsport Fantasy is kind of redundant since it is neither as compact as the Dahon MuEX nor as fast as the Merida road bike.

However, there were no takers for this bike despite the good price and excellent condition of the bike. Most people prefer either a folding mini velo such as the Tyrell FX or a pure road bike. There is no urgent need for me to sell this bike, so instead of trying too hard to sell it off, I decided to keep the bike and re-purpose it.

This means a new project for me! I have done many bike projects, from heavily modifying a Dahon folding bike from 7 speed to a 2x11 speed Di2 drop bar bike, to building up new bikes from scratch (Dahon MuEX and this Wheelsport Fantasy mini velo). Therefore, it would take something different to find a fresh project that is new and interesting for me.

The first and most heavily modded bike that I worked on, the Dahon Boardwalk. I learnt so much about bicycles from upgrading this bike.

My first bike that was built from scratch, after buying only the bike frame. Objective was to build an affordable, high performance and lightweight folding bike.

If I were to start a new project with the Wheelsport Fantasy mini velo bike, then I want to do something different that I have not done with my other bikes. Based on specifications alone, this bike can be considered a pretty high end bike, with a full Ultegra 6800 groupset, top of the line seat post, saddle, stem, handlebar, tires and etc. There is not much room to further improve this bike unless I go for even more expensive stuff. Instead of trying to improve it, I wanted to make it unique and different from my other bikes.

Unique features of some of my bikes:
Dahon Boardwalk: 2x11 speed Ultegra Di2 drop bar setup
Dahon Vitesse: 2x10 speed bullhorn handlebar setup
Dahon MuEX: 2x10 speed Ultegra/XTR Di2 flat handlebar setup
Avanti Inc 3: Weatherproof bike with Alfine 11 internal hub, Gates belt drive, disc brakes

Some project ideas that popped into my head was to make this bike super lightweight, or to go for a front single setup, or to change to a flat handlebar setup. At the same time, I did not want to spend too much on getting too many new components for the bike.

After some consideration, I decided to go for a front single 1x11 speed setup, which is something that I have not done before. Also, since a front single setup allows for some weight savings from losing the front derailleur and the inner chain ring, I decided to go all the way, and set the secondary objective to be cutting weight from the bike wherever possible. This will be done while minimizing any spending on new components.

In order to go for a front single setup, one important consideration is to prevent chain drop from the chain ring. Previously when I upgraded the crankset on the Dahon Boardwalk from the stock crankset to Shimano 105 crankset, I suffered frequent chain drops when I shifted the rear derailleur outwards quickly. The chain would fall off the chain ring as there is no front derailleur to prevent the chain from jumping off.

This chain derailment is partly due to the shorter teeth on the double crankset, which is designed for smooth shifting, unlike the single chain ring which has taller teeth. The solution was to install the inner chain guard and also the external chain guard on the crankset to prevent the chain from falling off.

However, for this new setup, I would like to simplify it and not resort to using a chain guard to prevent chain drop.

One innovation which has gained a lot of popularity in recent years has been the narrow-wide chain ring, where the gear teeth are deliberately made to have alternate narrow and wide tooth profiles to fit the narrow and wide links on the chain. This reduces the looseness between the chain and the gear teeth, improving chain retention even over bumpy terrain.

Example of a narrow wide chain ring, with alternate narrow and wide gear teeth

This type of narrow wide chain ring is usually reserved for mountain bike usage, where there is off road terrain that is bumpy. However, there are also road versions which are designed for cyclocross usage. The bolt circle diameter (BCD) and the number of teeth would be designed to suit road cranksets.

Since I plan to use the current Ultegra 6800 crankset, I would need to get a narrow wide chain ring that can fit the crank arm. The tricky part is getting a compatible chain ring as the BCD of the 4 arm crankset is 110mm and the 4 arms are unevenly spaced. After some searching, it seems that only Wolf Tooth has the type of chain ring that I need.

I got the largest sized chain ring that they have, which is the 44T Drop Stop Narrow Wide chain ring in the unique Shimano 4 arm road crankset BCD and arm angle.

The special 44T narrow wide chain ring from Wolf Tooth, weighs 87 grams.

Alternating narrow and wide teeth improves chain retention

Thicker mounting area improves the stiffness of the chain ring and also makes it match better to the crank arm

Comes in 110mm BCD and the Shimano road 4 arm configuration

A chain ring bolt for double chain rings has to be used as the mounting area is thicker. The length is perfect as the nut length is just below the counterbore on the chain ring.

The chain ring bolt is recessed within the chain ring which is a neat design.

Looks really good with the gold coloured chain ring bolts on the 4 arm crankset!

Weighs 425 grams for the right side crank

625 grams for the complete Ultegra crankset. Still heavier than the Dura-Ace 9000 crankset with double chain rings though...

The previous Ultegra 6800 2x11 speed setup has the gearing as shown below, with a 52/36T crankset and a 11-25T cassette on 451 wheels. Changing to the 44T front single chain ring, with the same cassette and wheel size would give the new gearing shown below. Coincidentally, 44T is the average of 52T and 36T, as (52 + 36)/2 = 44.

Gearing table comparing the 2x11 speed drivetrain vs the new 1x11 speed drivetrain

Gear range is reduced when the 2x11 speed drivetrain is changed to 1x11 speed, with the top two and bottom two gears sacrificed. However, there are still 11 fully usable and non-overlapping gears.

Will this gearing be sufficient? Before actually changing to the 1x11 setup, I rode my usual routes and took note of the highest gear that I usually use. Since this is not a road bike which is capable of higher speeds, I found that the highest gear that is normally used on this bike is Gear 9 on the 52T chain ring, which corresponds nicely to the top gear in the 1x11 speed setup (88 gear inches). The 10th and 11th gears are only used when sprinting really hard or pedaling downslope.

Speed vs cadence at different gears

With a speed of 37 km/h when pedaling at 100 RPM in the highest gear, this is more than sufficient for sustained speed, although it would be good to have one higher gear for the occasional sprint. I would have preferred a chain ring with 46T or 48T, but it is not available in those sizes.

This also means that the top gearing is too low for pedaling when travelling downslope, but I am OK with it as I would not want to go downslope too fast on a mini velo. On the other hand, the lowest gearing of 38.7 gear inches also means that steeper slopes will be really tough, but that is a compromise of having a 1x11 speed setup. Changing from a 11-25T to a 11-28T cassette would give a lower gear, so that is an option in the future.

With the chain ring and gearing for 1x11 speed settled, the next step is to reduce the bike weight by shedding off as many unnecessary components as possible.

Part 2 continued here

Saturday, May 14, 2016

Cycliq Fly 12 Front Camera + Front Light - Installation and Usage

As of May 14 2016

Mounting options - Garmin and GoPro
Garmin mounting not stable
Does not remember last light setting
No Android app yet
Unable to set recording quality
Unable to review footage on smartphone
Good battery life
Powerful front light
Flash mode too intermittent
Strobe mode too fast
Unable to set light and camera mode independently
Excellent video quality
Easy to use button to save important footage
Rainproof
Auto looping of video footage - Up to 7.5 hours on 64GB MicroSD card
Cannot use as front light alone


Thursday, May 12, 2016

Merida Scultura 5000: Ultegra Di2 6870 Part 3

With the Merida Scultura 5000 road bike upgraded to Ultegra 6870 Di2 components, this bike is pretty much a well upgraded bike that rides, shifts and brakes really well. Nothing much more that I can really ask for from this bike.

One thing that I noticed with the recent Di2 upgrade is that the D-Fly wireless unit is mounted on the right side seat stay, as recommended by Shimano. This unit can actually be mounted in between almost any two components, and it will still work to link up the Di2 system to a compatible ANT+ computer. The ANT+ computer that I am using is the Garmin Edge 510.
.
D-Fly wireless unit mounted on the right side seat stay. It is connected in between the rear derailleur and Junction B.

However, I find that this mounting position is not that neat, as it creates excess wiring around the rear drop out area that is messy. It would be best if this D-Fly unit can be relocated to a less conspicuous location.

I came across this blog from a bike mechanic that shows in detail how the D-Fly unit can be installed inside the head tube of a road bike. The details can be found at this link.

It would be very neat if the D-Fly can be mounted internally as shown, but it seems like a lot of work and I am not looking forward to removing the headset and fiddling around with internal wiring again.

The compromise would be to relocate the D-Fly to another external location on the bike, but in a less obvious location. Finally, I decided to mount the D-Fly around the bottom bracket area, similar to how it was set up on the Dahon Boardwalk and the Wheelsport Fantasy mini velo.

In this case, there is no space to mount the D-Fly unit behind the seat tube as there is very little clearance with the rear tire. After some trial and error, it was found that it is possible to mount the D-Fly unit in front of the seat tube, underneath the FD clamp. As this place is near the front derailleur and Junction B, it would be easy to run the wires along this area without being too messy.

Final location of the D-Fly unit, mounted on the seat tube, under the FD clamp.

In this configuration, the D-Fly wireless unit is connected in between the front derailleur and Junction B. It still works fine, which shows the flexibility of the E-Tube system for connecting all the Di2 components. With this arrangement, the D-Fly unit is nicely hidden along the seat tube, behind the crankset and under the tool bottle.

At the same time, the wiring at the rear derailleur area also becomes more tidy, as there is only a short section of wire that is visible. Due to the internal routing on this bike frame, the Di2 wire can run through the hollow right side chain stay, and straight into the rear derailleur.

Neat wiring at the Ultegra 6870 Di2 rear derailleur, with only a short section of Di2 wiring visible.

View of the full bike with the D-Fly unit hidden behind the crankset, and neat wiring at the rear derailleur area.

Full specifications of this Merida Scultura 5000 road bike. Weighs 7.3kg without pedals.


Sunday, May 1, 2016

Merida Scultura 5000: Ultegra Di2 6870 Part 2

This continues on from Part 1 of this Ultegra Di2 upgrade project. In Part 1, the original mechanical shifting components were removed from the Merida Scultura road bike, and some of the Di2 components were installed. As this bike is internal routing compatible, the wires have already been passed through the frame and they now end at the bottom bracket area. Next step is to connect them up to Junction B!

The 4 wires (from RD, FD, battery, Junction A) all end at the bottom bracket area. This took some time as it was not easy to thread the wires through the frame.

All the 4 wires will be linked together with the small internal type Junction B. Now, I need to fit everything back into the frame.

The Junction B has been placed into the downtube area just in front of the bottom bracket. I left a loop of wire sticking out to make it easier to remove next time if there is a need to.

Once the wiring has been connected, I tested the system and was glad to find that everything is working properly. The next step is to put back the bottom bracket and crankset, and tidy up everything on the bike.

New cabling since there is no longer any shifter inner cables or shifter outer casings.

The Junction A is tied to the rear brake outer casing, and tidied up with some cable wrap.

The D-Fly wireless unit have been placed on the right side seat stay. It is connected between the rear derailleur and Junction B.

Bottom bracket, crankset and chain reinstalled onto the bike!

New Di2 drivetrain with electronic shifting components.

Ultegra 6770 Di2 shifters! Small and compact sized, it is more comfortable that the mechanical shifters.

I tried to tidy up the wires and cables we neatly as I can using cable wrap

View of the handlebar area.

Less cables running around the front of the handlebar compared to the mechanical shifting setup

View of the full bike with Ultegra 6870 Di2 setup. Not much difference in appearance.

From the right side, the main difference would be the electronic front and rear derailleurs. Other than that, it looks very similar to the mechanical shifting version.

With this component exchange project completed, the Merida road bike now has Ultegra 6870 Di2 components, while the Wheelsport Fantasy Mini Velo has the Ultegra 6800 mechanical shifting components. This is the 4th Di2 installation project that I have completed, after the Dahon Boardwalk, Dahon MuEX, Wheelsport Fantasy Mini Velo, and now the Merida Scultura 5000.

Click here for Part 3!