Thursday, March 27, 2014

How to Build an Affordable, High Performance, Lightweight Folding Bike: Part 2

Continuing on from the first part of the guide, here is the second part of the guide. To recap, the main objective of this bike project is to build a 20 inch folding bike that is Lightweight, High Performance and Affordable.

Target is to build a 20 speed bike with a weight of <9.3 kg (without pedals) and total cost of < SGD 2000.

More components listed below!

Seatpost
Model: LitePro A61 seatpost, Diameter 33.9mm, Length 600mm, Weight Limit 80 kg
Estimated Weight: 350 grams
Actual Weight: 314 grams
Source: Taobao
Price: 0. Included as a package with the MuEX frame.
Alternatives: Crius Seatpost (416 grams, weight limit 105 kg), LitePro Carbon Seatpost (300 grams), KCNC seatpost, Controltech Carbon seatpost

This is a lightweight seatpost that has a lower weight limit than most other seatposts, at only 80 kg. For a lightweight rider this is fine, but a heavier rider should use a stronger seatpost so as not to exceed the recommended weight limit.

Picture from Taobao

Another picture of the seatpost 

Saddle
Model: Biologic Impel
Estimated Weight: 230 grams
Actual Weight: 286 grams
Source: MyBikeShop
Price: $20

This is a pretty normal saddle, and it comes stock on many Tern bikes. It is also cheap at only $20, and yet is quite comfortable. The red lines on the saddle also matches the lines on the frame very well. Slightly heavy though. Possible to save quite a bit of weight here if a lightweight (but more expensive) saddle is used.

Biologic Impel saddle. The lines come in other colours such as blue, green, orange, white, etc.

I have tried mounting the saddle on the LitePro seatpost and the clamp seems to be OK. It is not tilted as shown in the picture below.

Poor design or installation, causing tilted clamps on the saddle rails

Handlebar
Model: LitePro Monster
Estimated Weight: 200 grams
Actual Weight: 178 grams
Source: Taobao
Price: $15
Alternatives: LitePro Spirit ($30, 146 grams), LitePro SuperLight Carbon ($80, 99 grams)

Nothing special about this handlebar, it is strong and relatively lightweight, and also cheap. No need to use a fancy carbon handlebar, I can spend the amount saved on other components where it actually improves performance.

LitePro Monster handlebar

At this point, the bike can be said to be one third completed. The basic outline of the bike can be seen, with the handlepost and seatpost fixed up, together with the wheels. However, it is still far from done as there are still many components to be installed. From the pictures below, you can see that the FD roller and the RD hanger are already installed on the frame.

Some pictures of the bike building in progress!

View of the partially built bike

Hardly any components installed yet

Shifters
Model: Shimano Road Flat Handlebar Shifters SL-R780, 2 x 10 speeds
Estimated Weight: 280 grams
Actual Weight: 274 grams
Source: Bike Discount
Price: $180
Alternatives: Shimano Tiagra SL-4600 flat handlebar shifters ($110)

The reason I chose a road flat handlebar shifter is because I am building a 2x10 speed bike. As explained in another post (Road or MTB Components for Dahon / Tern Folding Bikes?), it is best to use road components for a 2x10 setup.

I don't like to compromise on shifters, which is why I went for the top end flat handlebar shifter, SL-R780. Naturally it shifts very well, with light shifting and nice clicking feeling. It has Instant Release and Multi Release features which originated from the MTB shifters. Another reason why I chose this is because it comes in black colour which matches the colour scheme of the bike nicely.

The Tiagra SL-4600 flat handlebar shifters are very similar to this, except for the colour, and there is no Multi Release feature. Other than that, they are virtually the same. The Tiagra shifters are much cheaper at $110 for a pair, so it is a very good alternative.

2x10 speeds SL-R780 shifters

Glossy black finishing the matches the bike

Nice aluminium lever that gives a very high end feel

Top view of the shifter

Brake Levers
Model: Shimano Deore LX V Brake Levers
Estimated Weight: 200 grams
Actual Weight: 206 grams
Source: Bike Discount
Price: $50
Alternatives: Shimano Deore XT BL-T780, Deore BL-T610/T611, Avid FR-5, Avid Speed Dial 7, KCNC or TRP lightweight brake levers, Extralite brake levers

For brake levers, it is a critical part of the bike. If the brake lever bends or snaps off while riding, it could be disastrous. Some of the lightweight brake levers look pretty flimsy and I am not sure if they will hold up to regular usage. I decided to go for the safe and solid option of Shimano brake levers. If is possible to save 100 grams here from using super lightweight brake levers.

A good and cheap alternative would be the new Deore BL-T610/T611 brake levers, the price should be around $30 for a pair.

Deore LX V brake levers. Comes in full glossy black colour to match the bike.

V Brake Caliper
Model: Shimano Deore XT BR-T780 V brake calipers
Estimated Weight: 330 grams
Actual Weight: 355 grams
Source: ChainReactionCycles (CRC)
Price: $30
Alternatives: Deore LX BR-T670, Deore BR-T610, Avid Single Digit 7, Extralite / KCNC super lightweight brake calipers

For V brake calipers, the performance is quite similar between Deore and Deore XT. The differences are mainly the surface finishing and the material used for the hardware. The Deore XT V brake calipers use stainless steel and aluminium hardware to prevent rust. Possible to save maybe 100+ grams here if super lightweight brake calipers are used.

Deore XT V Brake Calipers

Grips
Model: Stock grip from my Polygon Cozmic CX 3.0
Estimated Weight: 120 grams
Actual Weight: 104 grams
Source: Any bike shop
Price: $20-$30

I just used an extra pair of grips that I had lying around, no need to buy a new pair. These lock-on grips are actually quite lightweight. A similar pair of grips can be found at almost every bike shop for $20+. Foam grips would be even lighter though.

Entity branded grips. Lock-on grips and also lightweight, not bad for a stock grip!

This is the end of the second part of the guide! In the third part of the guide, the rest of the components (mainly drivetrain components) will be shown.

Part 3 of the guide is now up! Click here to continue reading.

Wednesday, March 26, 2014

How to Build an Affordable, High Performance, Lightweight Folding Bike: Part 1

There are many different types of folding bikes available in the market. By different, I am referring to the purpose that the folding bike is designed for. Some are designed to be for leisure riding, some for speed, some for touring, and some that are a mixture of different categories. Depending on the target market, each of these type of folding bike will have different grades of components and parts, and of course a different price range.

As an example, my Dahon Boardwalk is built primarily as a touring and commuting bike. The rear rack allows panniers to be carried for touring or commuting, while the full fenders block most of the splashes from wet roads. A double kickstand is also included for practicality's sake. However, look beneath the surface and a different type of bike can be spotted. Drop bars and slim Kojak tires reveal the speedy desire of the bike, while a quality Shimano Ultegra Di2 groupset ensures good power transfer and effortless electronic shifting. Folding size is not ideal due to the size of the drop bar, neither is the weight due to the variety of accessories installed on the bike. The total weight of the rear rack, kickstand and fenders is already 1.4kg.

My Dahon Boardwalk, mainly a touring / commuting bike

Recently, I had the idea to start a new project, to build a new folding bike with different objectives. The three keywords for this new folding bike would be Lightweight, High Performance and Affordable. What do these keywords mean? Here are my definitions:

Lightweight
In order to reduce the weight of a folding bike, lightweight components will need to be used. This means paying more for high end components that weigh less. Any accessories that are not essential to function will not be installed, for example fenders or kickstand. However, one thing that I will not sacrifice is safety. There are some components that are really lightweight, but they may not be safe to use as they are fragile and may break easily. This is especially critical for parts such as the brake levers or handlebar. Examples of lightweight bikes in the Dahon or Tern range would be the the Dahon MuSL (8.7kg without pedals) or Verge X20 (9.3kg without pedals). In my opinion, a folding bike is only considered lightweight if it weighs less than 10kg without any accessories.

High Performance
This means using good quality components that function well, with specifications that are comparable in function with high end bikes. A single speed folding bike would of course weigh the least, but in my opinion, high performance would be defined as a bike that has a reliable 2x10 speed drivetrain, with quality braking components and a smooth rolling wheelset. The components need not be of the top end range (such as Dura-Ace or SRAM Red), but they should have a performance that is at least 80-90% of the top end components. As a reference, I will be using the Verge P20 and Verge X20 (both 20 speeds) for component comparison.

Affordable
It is quite difficult to define what is affordable, as this is very subjective. What may be affordable to you may be too expensive for me. In this case, I would be using the price range of Tern bikes as a rough guide. Tern folding bike prices range from $500+ to $4000+, so the range is quite big. To me, affordable would mean below the $2000 price point. Although this may seem quite high, this is actually a reasonable price to pay for a lightweight, high performance folding bike.

As you may already know, these 3 keywords tend to contradict each other. For example:
1) A lightweight bike that is high performance will likely not be affordable. An example would be the Dahon MuEX (no longer in production) or Tern Verge X20. These bike models weigh below 9.3kg (without pedals), but cost more than $4000 each.

Tern Verge X20. Lightweight and high performance, but quite expensive too.

2) A lightweight bike that is affordable is quite difficult to find. Other than a single speed bike, practically all affordable bikes weigh quite a bit (>10kg) as they don't use lightweight or high end components.

3) A high performance bike that is affordable is also quite hard to come by. Most high performance components don't come cheap, and even if they do, they are not the lightest around. A good example would be the recently launched Tern Verge P20. By my definition it is a high performance bike (20 speeds with a decent wheelset and drivetrain), and is still affordable at $1700. However, the weight is 11.0kg which is not considered lightweight.

Tern Verge P20. Relatively affordable and high performance, but not in the lightweight category.

To start off the project, I first needed to quantify the targets. Using keywords alone would be difficult as there are no measurable targets or objectives. Thus I decided to put some numbers to support each of the keywords.

Lightweight - Target weight would be that of the Tern Verge X20, at less than or equal to 9.3kg without pedals.
High Performance - 20 speed road drivetrain, using at least a Shimano 105 drivetrain and shifting components, with Deore and above V brake components and a smooth rolling wheelset + tires.
Affordable - To keep the total component price to below $2000. The lower the better.

So far there are no Dahon or Tern folding bikes that I know of that fulfill these criteria (20 speeds, <9.3kg, <SGD $2000).

Other than these targets, another important objective is to achieve a compact folding size. This means a flat handlebar folding bike (which is also more lightweight than a drop bar or bullhorn bar folding bike).

Before actually getting the parts for this bike project, I created a simple Excel spreadsheet that totaled up the weights and prices for each of the components. This allowed me to swap components easily to compare the weight and price differences.

Estimated components to be used and their respective estimtated weights

According to the Excel table, the total weight of the bike will be around 8.8kg without pedals, and 9.2kg including the Shimano PD-A530 SPD Pedals. This is a theoretical value based on estimated weights. The weight of the individual components are estimated based on previous samples or information available online.

In the following sections of this post, I will be listing out in more detail the various components that make up the bike, along with the weight and price of each part. Each of the parts were weighed with a digital weighing scale, and the prices are rounded up to the nearest $5 (including shipping costs). The source of the pricing will also be given (although it may not necessarily be where I got it from).

If necessary, I will also give some justification as to why I chose that component instead of another. As a bonus, I will also offer alternative choices for further cost reduction, weight reduction or better performance.

Frame
Model: Dahon MuEX Frame 
Estimated Weight: 2400 grams
Actual Weight: 2340 grams (includes seatpost shim, seatpost clamp, RD hanger and FD roller)
Source: Taobao
Price: $450 (including shipping)

The frame is the most important part of the bike. With a good frame, you can put a wide variety of components on it, and there would not be any major compatibility issues. The top end Dahon MuEX frame is one of the best folding bike frames you can find out there, being lightweight and stiff. Selecting a Dahon frame also ensures that compatible aftermarket parts and accessories can be found easily.

The frame comes with the metal seatpost shim, seatpost clamp, RD hanger and FD roller.

Dahon MuEX frame, a good platform to build on!

Fork
Model: Dahon Puro U7 Aluminium Fork for Mu Frame 
Estimated Weight: 440 grams
Actual Weight: 488 grams (including steel compression bolt)
Source: Taobao
Price: 0. Included as a package with the MuEX frame.

The lightweight Dahon Puro U7 aluminium fork is included as a package with the frame, thus there is no need to purchase separately. In fact, the package includes many items, such as the fork, handlepost, seatpost and headset.

Original Dahon aluminium fork for Mu frames

It was during installation that I realised that although the compression bolt for the fork is included, the brass shim is not. Although the bolt can be installed without the brass shim, it is better to include the shim, in order to ensure a more consistent tightening torque.

Brass shim for Dahon compression bolt

Goes onto the base of the handlepost before tightening the compression bolt on top.

Handlepost
Model: Fnhon 31.5cm, dual bolt 
Estimated Weight: 524 grams
Actual Weight: 542 grams
Source: Taobao
Price: 0. Included as a package with the MuEX frame.
Alternatives: Fnhon handleposts of other lengths, or the 4 bolt handlepost

This is a Fnhon 31.5cm, dual bolt handlepost. For more details and pictures please click on this link. Similarly, this component is included as a package with the frame.

For an installation guide on Dahon / Fnhon handlepost, check out this blog post for the details.


Headset
Model: LitePro Headset
Estimated Weight: 80 grams
Actual Weight: 72 grams
Source: Taobao
Price: 0. Included as a package with the MuEX frame.

I shall not go into details for the headset, it is a pretty standard LitePro headset. For a LitePro headset installation guide, check out this link.

I had asked for a black coloured headset for the bike, but they sent over a red coloured one instead. In the end it looks pretty good as the red cover matches the red accents on the frame.

 LitePro headset

Wheelset
Model: Wheelsport Sunny 406 wheelset 
Estimated Weight: 1144 grams (same as Wheelsport Smart 1.0)
Actual Weight: Front wheel is 484 grams. rear wheel is 698 grams. This excludes the weight of the Velox cloth rim tape.
Including rim tape, the weight is 495 grams for the front wheel, 709 grams for the rear wheel. In total the wheelset weight (including rim tape) is 1204 grams
Source: MyBikeShop
Price: $350
Alternatives: Wheelsport Smart 1.0 ($480), Kinetix Pro ($600+)

The original price of this Wheelsport wheelset is $380, but you might be able to get a discount if you don't need the bike shop to install the wheelset, change tires or cassette for you.

I chose this Wheelsport Sunny wheelset as it is affordable and with good performance. Previously I was using the Wheelsport Smart 1.0 wheelset and I find it to be very good. Thus I believe that the Wheelsport Sunny wheelset would have a similar performance. The main difference between the Sunny and the Smart 1.0 is that the Smart 1.0 has a higher profile rim. Other than that the hubs and spokes look pretty similar.

Using the lightweight Kinetix Pro rims will save even more weight, perhaps up to 150 grams compared to the Wheelsport Sunny. However it is much more expensive.

The Wheelsport Sunny and Smart 1.0 has 20 spokes in front, and 24 spokes on the rear. The Kinetix Pro has 14 spokes in front and 16 spokes on the rear wheel.

Wheelsport Sunny wheels in black colour

Closeup look at the front wheel

Closeup look at the rear wheel

I found that almost all of the spoke holes on the rim has some burrs, which can cut through the inner tube if the rim tape is not properly laid. Since I have removed the original plastic rim tape, I decided to take the effort to deburr the holes with a file. It was quite a lot of work due to the many spoke holes.

Filing the side of the spoke holes to remove burrs. I could not use a deburring tool as there were insufficient space between the rim walls to use the tool effectively.

Good quality Velox cloth rim tape. This is much better than plastic rim tapes at protecting the tube from the sharp edges of the rim spoke holes.

Tires
Model: Panaracer Minits Lite, 20x1.25", folding bead 
Estimated Weight: 340 grams/pair
Actual Weight: 342 grams/pair (folding bead)
Source: MyBikeShop
Price: $80/pair
Alternatives: Schwalbe Kojak 20x1.35" folding (460 grams,$120/pair), Schwalbe Durano 20x1.1" (380 grams/pair), Schwalbe Ultremo ZX 20x0.9" (290 grams/pair)
These are really fast rolling tires from Panaracer. They are also lightweight and cheaper, which helps to keep the weight down. My first choice was actually Schwalbe Durano tires, but they were out of stock at MyBikeShop. Always get folding tires as they are lighter and easier to install/remove from the rims.

Panaracer Minits Lite folding bead tires, 20x1.25"

Inner Tubes
Model: Schwalbe SV6A Extra Light Tubes (Presta) 
Estimated Weight: 130 grams/pair
Actual Weight: 132 grams/pair
Source: MyBikeShop
Price: $30/pair
Alternatives: Schwalbe SV6 Tubes (190 grams/pair, Presta)
Using lightweight tubes can save some weight, but the reduced thickness or size might slightly increase the chance of getting a puncture. These are old tubes that were patched, but they are working fine.

Schwalbe SV6A Extra Light Tubes

Claimed weight of 65 grams is accurate!

Quick Release Skewers
Model: Agogo extra light titanium skewers, 74/130mm 
Estimated Weight: 42 grams/pair
Actual Weight: 43 grams/pair
Source: MyBikeShop
Price: $45/pair
Alternatives: Wheelsport original QR skewers, 113 grams/pair

This is a rather optional item, as you can just use the original Wheelsport QR skewers to save money. But I decided to try out this QR skewer as it can save quite a bit of weight. This Agogo skewer construction is actually not too bad as it does not use a rubber washer under the QR lever, which means the clamping force is better. For more details on good vs bad QR skewers please refer to this link.

The only thing to take note is that the titanium center axle tends to stretch a bit, so there is a need to re-tighten the QR lever once in a while.

Very lightweight Agogo titanium QR skewers

This post is getting really long, so I shall continue with the other components for this bike project in the second part of this guide.

The second part of the guide is now up! Click here to continue~

Saturday, March 22, 2014

Broken Stem Faceplate and Replacement Faceplate

On the day just before the 2014 NTU Bike Rally, I was inspecting the two bikes (Dahon Boardwalk and Dahon Vitesse) to prepare for the long ride. What I do is to check the braking and shifting functions, and ensure that all the folding joints are tight with no looseness. I will also ensure that all the bolts and screws on the bike are tightened properly. This means taking a screwdriver and different sized Allen keys to tighten every one of the bolts and screws on the bikes.

It was during this inspection that I found a loose bolt on the stem faceplate of the Dahon Boardwalk. Initially I thought that this bolt had somehow worked loose. But I found that it could not be tightened any further. I then realised that the other side of the faceplate was broken! No wonder the bolt was loose.

I first detected the loose bolt on the right side of the picture. Only after I tried tightening it that I found the broken part on the other side of the clamp. Both the bolts were still on the clamp and thus the broken part could not be seen easily.

I wondered how long I had cycled with this broken part on the stem! Luckily nothing else broke or gave way, or it could have been a really nasty accident, since the handlebar is such an important part of the bike. I was really glad that the other side of the stem faceplate held up fine.

This stem was installed only during mid January this year, and everything had seemed fine until I detected this broken part. Looking back, it could have been broken when the bike fell on its right side during one of my rides. The impact could have been transferred from the drop bar to the stem and broken the faceplate. That happened a few weeks before the NTU Bike Rally.

The broken part of the stem faceplate. Note that the material around the hole is really thin, which would mean a weak point on the faceplate. This is not safe as the stem is a critical part on the bike, and failure could have strong consequences.

Since I had no suitable spare stem, this means that I would not be able to use the Dahon Boardwalk if the stem is not replaced. I was already preparing to ride my other bike, the Avanti Inc 3 commuter bike for the NTU Bike Rally. It would have been more comfortable but perhaps more tiring due to the heavier bike weight.

It suddenly occurred to me that I could actually use the faceplate of a standard stem to replace the broken part! I just needed to make sure that it is a 31.8mm stem, and that the hole-to-hole distance of the replacement stem faceplate is similar to the original part (which is now broken).

I immediately went out to look for a suitable stem which has a faceplate that I can use. Rodalink at Jalan Jurong Kechil was the nearest bike shop with a variety of stems, and that was the first place I went. I was in luck as I found a suitable stem over there! By comparing the faceplate dimensions of the original part and the replacement stem, I found that the dimensions are a good match.

Replacement PRO stem with suitable faceplates

Same 2 piece faceplate design means that it will fit my stem easily!

Comparing the stem faceplates, the design is similar, and also use M5 bolts.

The hole-to-hole distance for the PRO stem faceplate is almost the same as the original silver faceplate. The difference in hole-to-hole distance is less than 1 mm and so it should work fine.

The PRO stem faceplate is more well built. There is more material above and around the bolt hole area, and it is also slightly wider at the hole area for better strength (refer to previous picture).

I used the Giant torque wrench to make sure that the recommended tightening torque of 4 N.m is not exceeded. I also used the Fiber Grip to ensure that the drop bar does not rotate in the clamp.

No problems with installation. It goes on nicely as a replacement part.

This replacement stem faceplate from PRO fits the original stem well.

In fact, this replacement part from PRO looks better than the original part! It is black with machined ends for a more high end look.

The replacement part fits so well that I was confident that this would work, so I didn't bother to test it out. The next day, I went for the NTU Bike Rally with the Dahon Boardwalk and everything worked fine. So glad that I managed to find the replacement stem faceplate! This replacement part is definitely stronger than the original part and so I am confident that the same failure would not happen again.

In summary, do take the effort and time to inspect your bicycle once in a while! This will prevent accidents from broken or worn out parts on the bike, especially before a long ride where the reliability of the bicycle is important. If in doubt, do not ride the bike until the problem is fixed!

Sunday, March 16, 2014

NTU Bike Rally 2014: Ride and Route Details

This year is the third time that I am joining the NTU Bike Rally! I first joined in 2011, followed by Bike Rally 2012. I skipped the 2013 version as they were attempting some Guinness world record, which would have made the event very messy.

So this year, the offered routes were 138km and 188km, which are longer than the previous distances of 128km and 168km. This means that it would be more challenging than previous years due to the longer route. I was also curious to know how the route would be like, as it is rather difficult to achieve these long distances in Singapore without looping back and fro.

Poster for NTU Bike Rally 2014. Credits: NTU Bike Rally Facebook Page

As usual, the route details are not released prior to the event. The location of the next checkpoint will only be revealed once you reach the current checkpoint. This supposedly keeps the ride more interesting as you will not know where you are going next. However, this also makes it a bit more difficult to prepare for the ride. Anyway, the route for each year is quite similar, so there would not be major changes, or would there?

This year, the NTU Bike Rally 2014 is starting from the F1 Pit Building, on 9th March, Sunday. Registration starts at 5am, but there is no need to go so early. Reaching at 530am or 6am is early enough to register and get ready for the ride, which starts at 7am. If you are driving down with your bike, the Singapore Flyer has the nearest carpark, but parking is expensive! The parking charges from 530am to 430pm came up to $33 dollars for 11 hours, as it costs $1.50 per half hour of parking.

Registration counter! Credits: NTU Bike Rally Facebook Page


I have always found it easier and faster to ride in a small group, as it is easier to go through traffic junctions without the group getting cut off. Also, it is easy to make changes to the route without asking too many people.

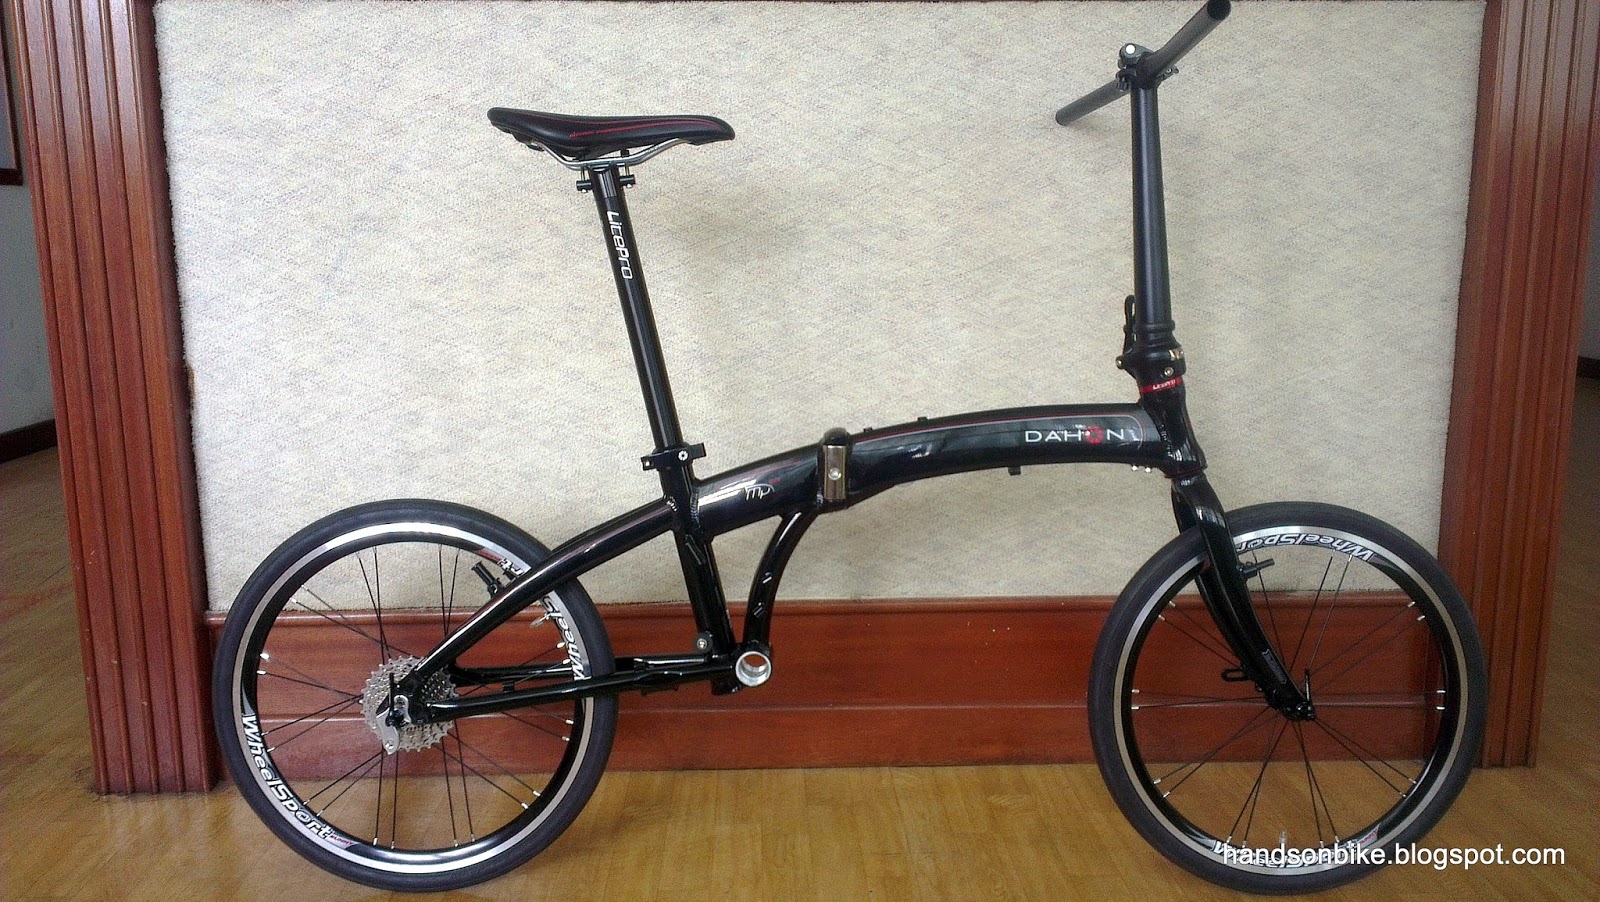
For this time, we were in a group of 3. Myself, my wife and Badrul. We were all on Dahon folding bikes. I was of course on my trusty Dahon Boardwalk, my wife was on the speedy Dahon Vitesse, and Badrul on his ever reliable Dahon Speed. These were all modified 20 speed Dahon bikes!

Since we did not plan to go for the longer route, we decided to wait by the side and let the speedsters go first.

One of the many safety cars for the day! Credits: NTU Bike Rally Facebook Page

715am: Set off from F1 Pit Building, 0 km
This time, we were in the 3rd wave of cyclists, which set off about 15 mins later than the first two groups. As usual, the route brought us up Bayfront Avenue, down Shenton way and towards Keppel Road. Normally, we would then travel along this road all the way to the first checkpoint, which is West Coast Park. However, this year's route is rather different!

The route actually sent us on a right turn towards Cantonment Road, and then along Jalan Bukit Merah. This is interesting as I don't think I have traveled this area before. Also, the terrain along this road is rather undulating, and there are many traffic lights along the way, which means it takes a bit more effort to keep the momentum going.

After that, we traveled down Alexandra Road, past Queensway to Pasir Panjang Road, before heading into West Coast Park for the first waterpoint.

8.00am: West Coast Park, 17km

 First part of the route: From F1 Pit Building to West Coast Park

This route is actually better and safer as it avoids the Vivocity area, where it can be messy and dangerous, with multiple lanes going to different places. If this was the intention of the organisers, well done!

From West Coast Park, we went along West Coast Highway, past the Jalan Buroh roundabout, and along Jalan Buroh. The next turn off point is actually at the Jurong Island bridge roundabout. This is the point where the route splits. The 138km route will turn northwards along Jalan Boon Lay as shown, while the 188km route would bring them towards Raffles Marina at the far west end of Singapore.

Again, this route is different as the normal turn off point is at Pioneer Road North.

After that, it is a pretty long stretch all the way to the main entrance of NTU as can be seen from the map below. Slightly longer than the usual route along Pioneer Road North.

Second part of the route, from West Coast Park to NTU.

The previous water point in NTU is at the Sports and Recreation Center (SRC), which means a relatively flat ride to the water point. This year, slopes galore! The route actually goes along the perimeter of NTU / NIE, which means going up the long and steep slope outside Hall 7!

Luckily we were rather familiar with the NTU terrain, having cycled here for a few times already. Thus we were mentally prepared for the slopes. Together with our 20 speed bikes, we were able to handle the slopes without stopping.

Many riders had to stop and push as they either did not have the necessary low gearing, or were just not strong enough to pedal up the slope. This must be one of those places where those on a bike with a single front chainring would wish that they had a front double chainring for lower gears!

Water point is at the back of the compound, at one of the NIE carparks. Since we were there pretty early, there was plenty of water, bananas and buns. There was even Red Bull available. I actually left the checkpoint with more food than when I entered.

8.55am: NTU (NIE Carpark), 33.8km

The only complaint here is that the toilet is up this long flight of stairs, all the way at the top and far in. Probably not ideal considering that we just cycled up the NTU slopes. We stopped for about 15mins at this checkpoint.

The next checkpoint would be at the carpark after Kranji Dam!

Route from NTU to Kranji Dam carpark

Riding along Jalan Bahar and Lim Chu Kang road was rather tough, as there were strong headwinds all the way. I could also see many people struggling with the winds and some even had leg cramps so early in the ride. Nevertheless, this road is not new to us and we were able to conquer it (although it was slow).

Yet another surprise near the Neo Tiew road junction! Normally the route would turn right onto Neo Tiew road, before exiting at Kranji Dam. This time, we actually went further down before turning right. This road is actually much better to cycle on as the road surface is smoother, and avoids the speed limiting strips along Neo Tiew road. Once again, nice route planning from the organisers!

10am: Kranji Dam Carpark, 49.4km

By this time, the weather was starting to get really hot and sunny, even though it was only 10am. Nothing special at this checkpoint. Basically it was top up water, eat some snacks and move on. We stopped for about 10mins here.

The next part of the route is the killer part. The planned route for 138km is actually to ride down Woodlands Road, and turn left to Mandai Road. At the other end of Mandai Road, turn left to Sembawang Road and then Gambas Avenue, before going up to Woodlands Waterfront for the next checkpoint.

This would have been really tough, especially with the slopes along Mandai and Gambas. In order to preserve our energy to ensure that we can reach the finish line, I made the decision to cut straight from Kranji to Woodlands Waterfront, as seen from my route shown on the map below. This shortcut actually saves almost 13km, and avoids the slopes. My plan was to actually ride the shortest route from checkpoint to checkpoint, avoiding big detours if possible.

On hindsight, I am glad we took the shorter route as I was really struggling at the end of the ride. As a bonus, this route is much more scenic, as we went past the Woodlands checkpoint, and then along the coastline! The view of the coast was quite amazing, and we could see every building along the Johor Baru coastline. This would be a nice place to cycle and relax.

Additional Info:
The 188km route is much tougher than this! From Kranji Dam, the route would bring the cyclists all the way down to Bukit Timah, along Dunearn Road, and then come up along Upper Thomson Road (I think), then to Woodlands Waterfront. That would have been a huge detour, and add a huge chunk of mileage! I can't imagine myself tackling that extra distance.

Our route from Kranji Dam to Woodlands Waterfront. Standard 138km route (not shown) actually goes along Mandai Road and Gambas Avenue before going to Woodlands Waterfront.

Of course, we took our time going from Kranji Dam to Woodlands Waterfront, using mostly the PCN and pavement and generally going slowly, as we were well ahead of time.

10.45am: Woodlands Waterfront, 58.4km

It was only 9km from Kranji Dam to Woodlands Waterfront, compared to the 22km it would have been if we followed the planned route all the way. The weather was really hot by now, so we took a longer break and of course drank lots of water and snacks. Rested for about 15-20 mins here.

Next stop, Punggol Jetty! From Woodlands Waterfront, we cycled along the northern part of Singapore, to the north-eastern part of Singapore. This was the toughest stretch of the route, as it was really hot and sunny by now, and there was very little shade along this route. I actually felt a little bit of cramps in my hamstring, and took a break to put on some Deep Heat cream. Better to put some as a preventive measure, than to wait till it actually cramps up.

The worst part was along the Punggol Barat / Timor Islands, where it is hot and dusty. The riders were also spread very far apart, with everyone going at their own pace. It must be rather interesting to see three folding bikes going along in a small group at a good pace.

Route from Woodlands Waterfront to Punggol Jetty

12.10pm: Punggol Jetty, 79.9km

When we finally reached Punggol Jetty, we were so glad to take a break from cycling. The sun was blazing hot by now, and there was practically no shade at all at the checkpoint, apart from a few sparse trees. This was also the longest stretch without a waterpoint. Once again, load up on Aquarius isotonic drink, water, buns and raisins. Think we stopped for about 15mins here.

The planned route was to take the road out of Punggol Jetty, all the way down to Buangkok East Drive, before traveling along Tampines Road to Pasir Ris Drive 3. This is again a long detour, which I could not afford given my lack of fitness/training/energy. To make it worse, the road out of Punggol Jetty is actually a long upslope, which I knew from previous rides. This is why it is useful to know the route beforehand, especially from experience, as you can then prepare yourself appropriately to tackle the terrain.

So once again, we took a shortcut by cycling along the Punggol PCN all the way to Lor Halus bridge. The PCN along this stretch is actually very quiet and scenic with hardly anybody in sight, especially under the hot sun at 12+pm. Also, the previous red clay path has also just been paved over and so there is no problem traveling along this route. We took our time along this route as there was plenty of time.

I was quite familiar with this route as I had just cycled there the previous week, so there was no risk of getting lost. After turning onto Pasir Ris Drive 3, we then turned onto Elias Road, which is rather slopey. The next waterpoint is near the carpark at the end, where the roundabout is.

1.15pm: Pasir Ris Park, 89.7km

Route from Punggol jetty to Pasir Ris Park

Taking this route instead of the original route saved us about 6.5km. Not so much considering the entire bike rally distance, but every bit counts when you are low on fuel.

Nothing special at this checkpoint. Stopped for about 10mins to fuel up and move on! We took the same route out and emerged onto Pasir Ris Drive 3.

Going straight down along Pasir Ris Drive 3, we then went onto the PCN and cut across to the side roads at the back. This avoids the slopes along Loyang Avenue, and also meant that we could cycle slowly at our own pace, without jostling for space with the vehicles on the main road. From there, we then turned out from Loyang Way to rejoin the main route along Loyang Avenue.

We then stopped at Changi Village to take our lunch break! This is not an official stop, as there is no Bike Rally waterpoint here. However, we have been stopping at Changi Village for lunch every year for the Bike Rally, and this year is no exception. The good food there is also a strong motivation to stop and take a break.

Route from Pasir Ris to Changi Village

1.55pm: Changi Village, 98.5km

Since this NTU Bike Rally is not a race, we took our time to order lunch and some cold drinks. Roti Prata + 100 Plus is a pretty good lunch, and it was a good chance for us to rest and refuel.

After around 40mins, we set off from Changi Village to continue on our journey. This time, it would be along Changi Coast road, all the way to East Coast Park. It was also along this stretch that we broke the 100km mark.

Route from Changi Village to East Coast Park

Luckily for us, it was not too windy along Changi Coast road. But it was a rather long road that can be rather taxing on the body and mind. Also, our legs had gone cold after resting for lunch, and it took quite a while to get the legs warmed up again.

There was no waterpoint at NSRCC, so we didn't stop there and continued to East Coast Park Carpark F2, where the waterpoint is.

3.15pm: East Coast Park Carpark F2, 113.8km

We were glad to take a break from the long and boring stretch of Changi Coast road. To our delight, there was an ice cream van located strategically just beside the waterpoint! The ice cream man certainly enjoyed good business on that day as I spotted many cyclists buying ice cream from him. We stopped for about 15mins here.

Now, for the last stretch of the Bike Rally! The route is very simple, just travel all the way to the Fort Road end of East Coast Park, exit to Fort Road and then go along Nicoll Highway back to the F1 Pit Building.

Route from East Coast Park to F1 Pit Building

Cycling in East Coast Park on a weekend can be very dangerous, with kids and pets running all over the place. There were a few near misses, and those were only avoided because we had anticipated them. By this time, we were rather tired and not going fast, at probably just over 20km/h.

I even had a stitch on my side while cycling, which I didn't thought was possible. After resting for 10 mins I managed to shake it off and continue on our way.

Exiting onto Fort Road, we linked up with some other road bikes which were also going on the final stretch. It was obvious that everyone was tired by now. In any case, we more or less stayed together in a group all the way to the finish line at the F1 Pit Building. This last stretch was surprisingly fast as everyone wanted to finish the ride strongly.

We were rather disappointed to see that there was no photographer at the finish line. To think that we deliberately slowed down when approaching the finish line to avoid other people and photobombing! The weather was still very hot, which could be why there wasn't anybody stationed over there.

The official timing by the side of the finish line showed 3.59pm when we crossed the line, coming in just a minute under 4pm.

3.59pm: Finish Line at F1 Pit Building, 126.5km

Overall route that we took for NTU Bike Rally 2014. Distance is about 126km.

In the end, the distance covered was comparable to previous years, and at at similar timing. This distance is rather accurate as the plotted distance on Mapometer is similar to that from my speedometer.

From start (7am) to finish (4pm), the entire duration was 9 hours. However, from my speedometer, the moving time was actually only 6 hours and 20mins. This meant that we actually stopped for more than 2 and a half hours. The rest stops certainly didn't seem that long as we only stopped for 10-15 mins at most of the waterpoints, but I guess it all adds up.

Even with the shortcuts, we still clocked a respectable distance of almost 128km, which is the planned distance for previous years of NTU Bike Rally. This year's edition is tougher than usual, as the route had more sloped terrain and was also longer. Also, another factor was the heat. It was very dry and sunny, making it very tough to cycle for the whole day.

My two-tone arm after the ride! I wore armsleeves but not gloves.


By my own calculations, if we had completed the full "138km" route as intended, it would be 126.5+13+6.5 = 146km! That is definitely more than the supposedly 138km route. I can't even imagine how far the 188km cyclists would have to travel.

I am rather happy with this accomplishment, considering that the previous longest ride was 70+km the week before, and no round island rides at all for at least 1 year prior to this event. There were also no mechanical problems at all for this ride, unlike in 2012 where we had a puncture.

Overall, this year's event is well managed as there are adequate signs at the turn off areas to prevent people getting lost. There were also many marshals situated at all the major junctions to direct the cyclists onto the correct route. The route was also well planned, avoiding messy and dangerous junctions, and also minimizing the number of right turns required. No shortage of supplies at the rest points, which is probably also because we arrived at the rest points comparatively early. Well done to the NTU Bike Rally 2014 Organising Committee!